Setting up an import for thousands of posts is very similar to manually creating a post. You create a template for your posts that WP All Import uses when importing your data. To set add data from your import file to your import template, you simply drag and drop it.
Video Tutorial : #
#
New Stock Update #
#
STEP # 01: Go To All Import #
- Go to your website.
- Toggle the main menu and click on All Import -> New Import.
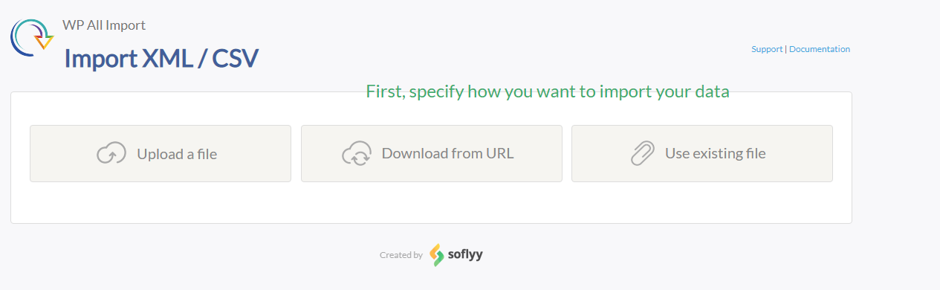
STEP # 02: Choose Upload File #
You will be directed to the page shown below. Here you can choose to upload the file from your computer, paste in a URL to the file, or choose an existing file that you’ve already used with All Import tool.
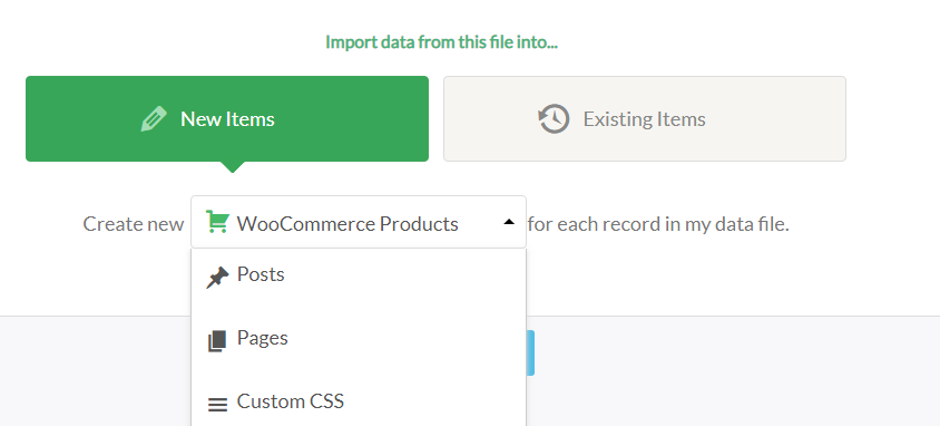
STEP # 03: New Import / Existing Items #
After uploading the file, you have to choose from one of the two options:
- New Items -> Create only new items.
- Existing Items -> If you are importing data from your file into posts that are already in your site, select Existing Items.
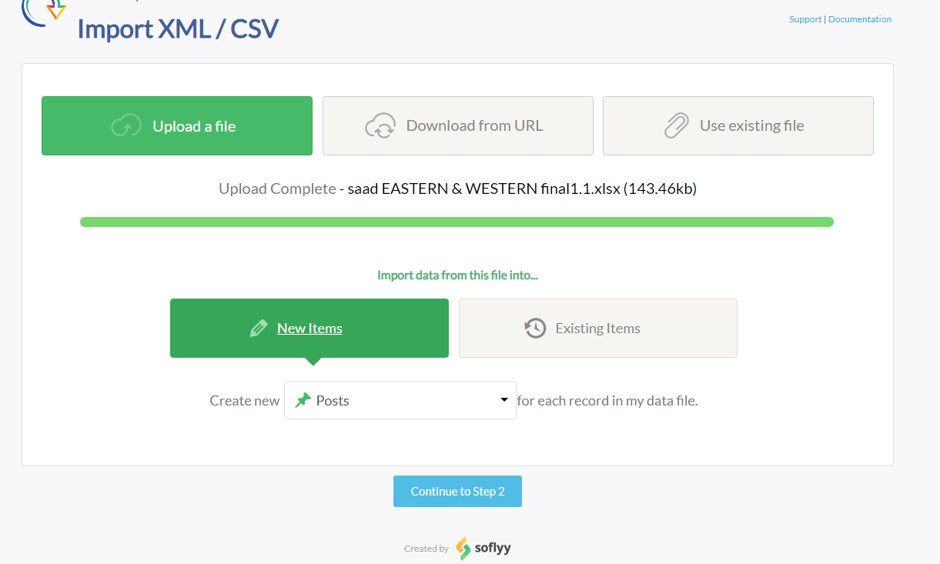
STEP # 04: Select Items #
Finally, you need to decide what you want to import, select the desired option from the dropdown and press the continue to Step 2 button.
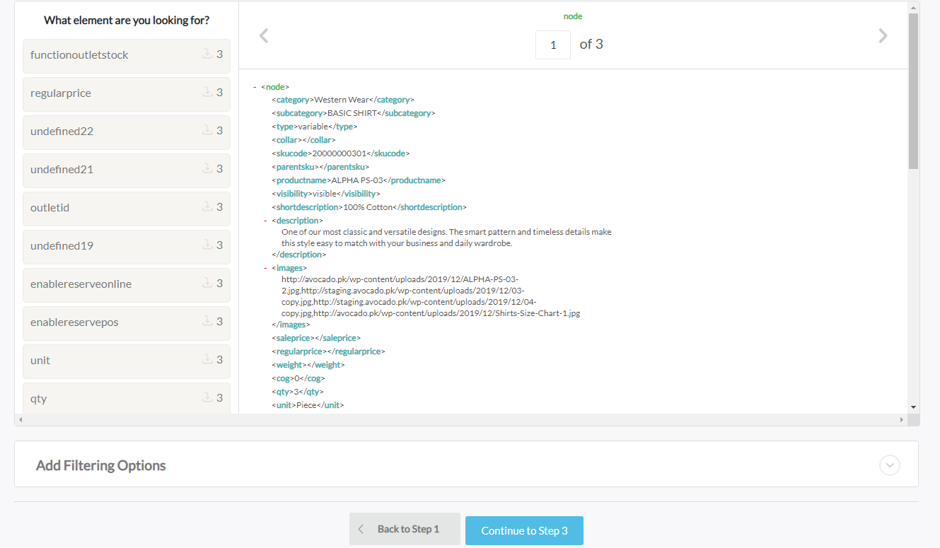
STEP # 05: Review Your Data #
All Import tool will process your file and prepare it for import. If you uploaded a CSV, check that the correct delimiter was used. If you uploaded an XML file, check that the correct node was selected.
If you only want to import some of the records in your import file you can add filter rules.
Click on continue to Step 3 button.
STEP # 06: Configure Your Import #
Every column or element from your import file will be displayed on the right. On the left you have your import. All Import tool will create posts using the import template you create here. Simply drag your import data from right to left. You can fill in as much or as little of the fields as you like depending on your needs.
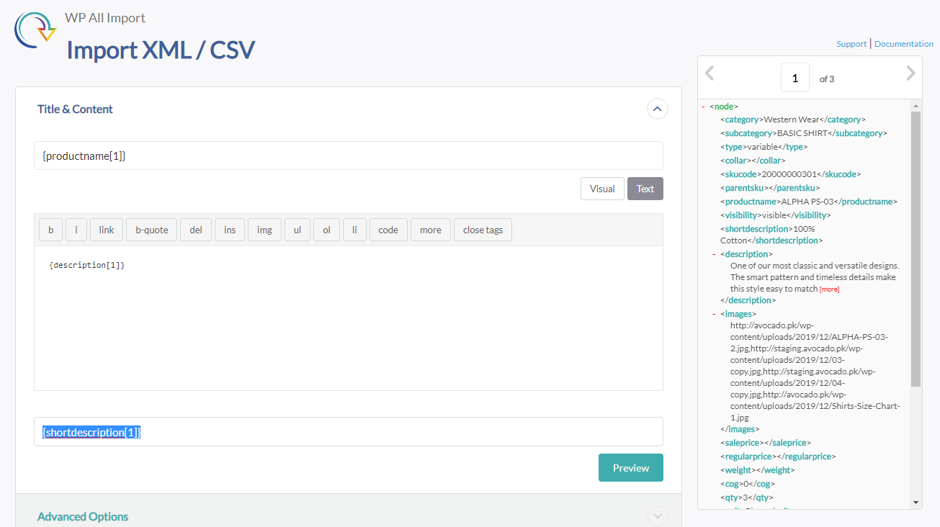
- Title & Content Section:
Drag & drop product name from the right side-bar to the title & content field as shown in the image below. Map each node in the field accordingly.
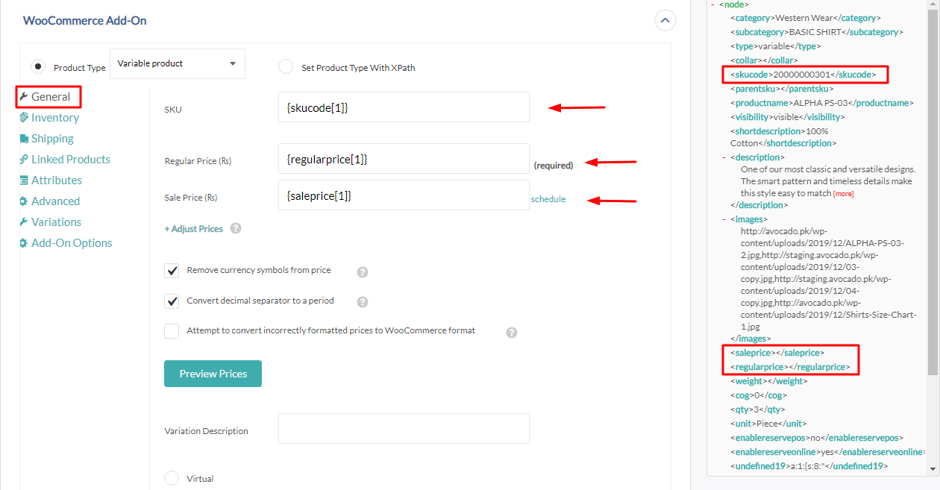
- Woo Commerce Section:
Select the product type from the options or you can specify the XPath by drag & drop the field from the right side-bar.
- In the General tab drag & drop the SKU Code, Sale Price and Regular Price. See the highlighted fields.
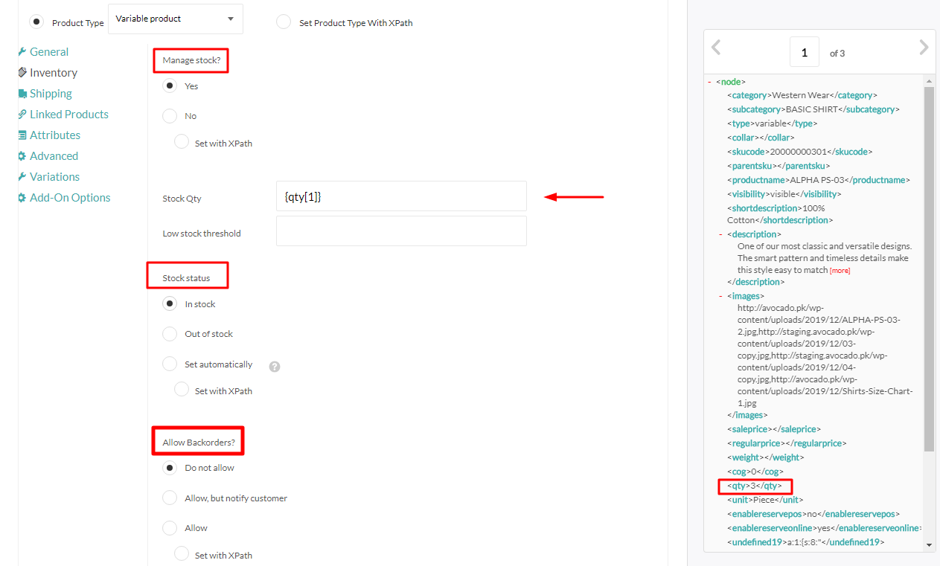
2. In the Inventory tab apply the options accordingly.
- Manage Stock.
- Drag & drop Stock Qty if any (not required from version 1.8, total of outlets stock will replace the All Stock.)
- Specify Low stock threshold as required.
- Select Stock status
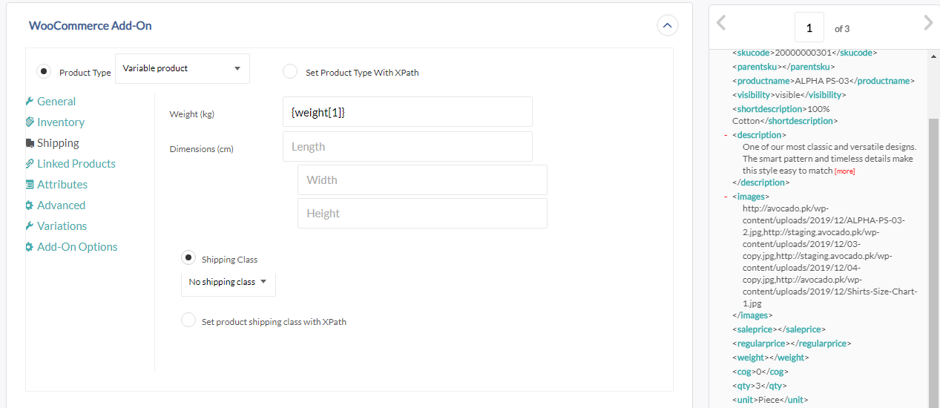
3. In the Shipping tab:
- Must specify weight of a product.
- Set Dimensions (optional).
- Select the Shipping Class from the options as required or specify the XPath.
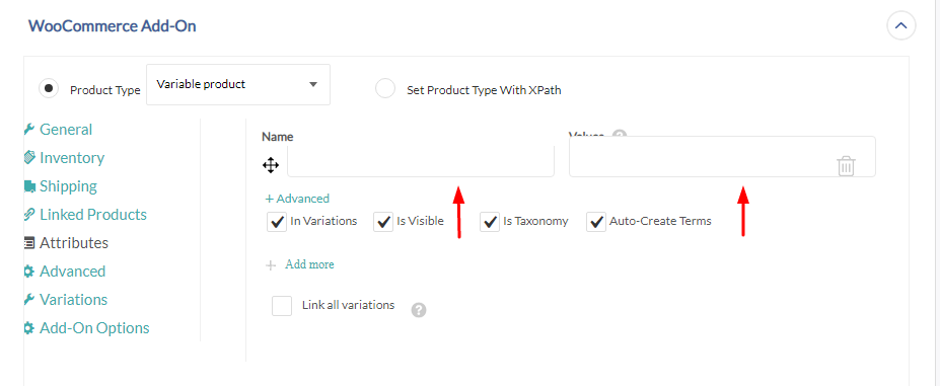
4. In the Attributes tab drag & drop the attributes in the fields.
If it is a variable product.
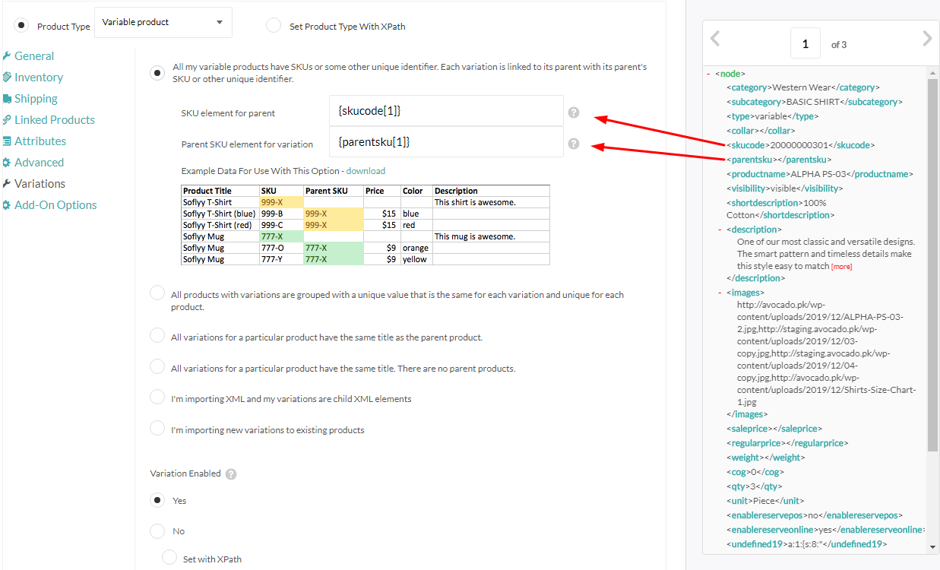
5. In the Variations tab:
- Select the desired option as highlighted in red color.
If it is a variable product.
- Select the desired option as highlighted in red color.
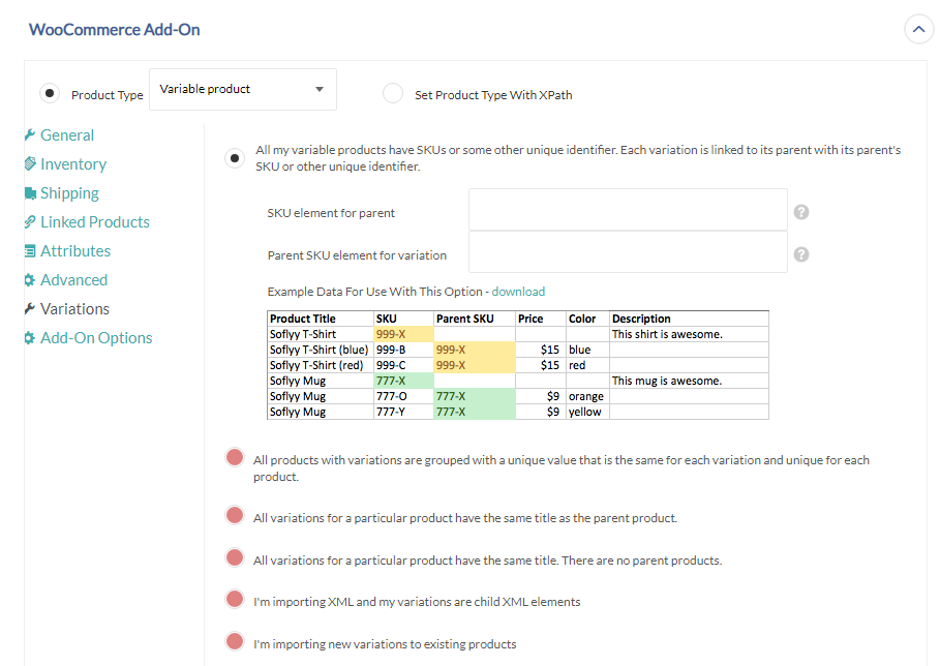
- Map the parent and child SKU’s accordingly as shown below.
- Image Section:
If you want to import the image from outside of the system than select the first option “Download images hosted elsewhere” and drag & drop image column into the field as shown below.

- Custom Fields Section:
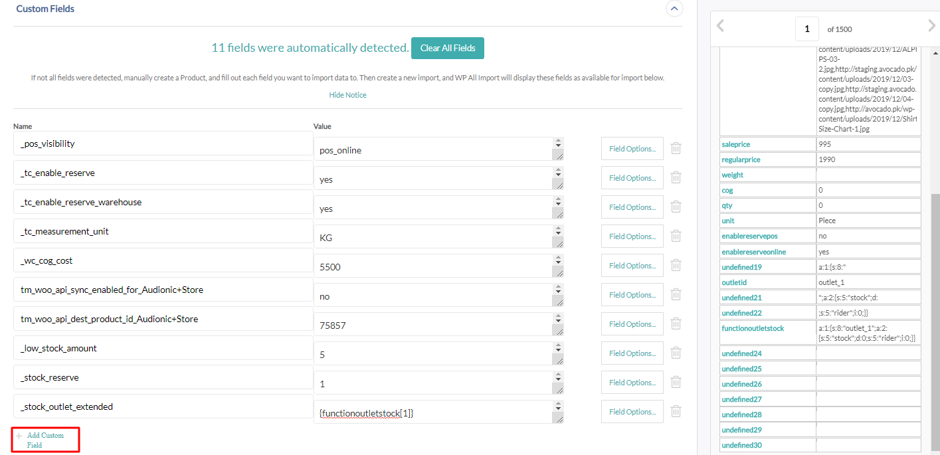
From version 1.8, add following custom fields for stock import which will be updated according to outlet stock
- stock_outlet_{outlet_id} => for available stock
- reserve_outlet_{outlet_id} => for reserve stock
Here {outlet_id} is Outlet ID, so like if we have 2 Outlets having IDs 1 & 2, their key will be as below
- stock_outlet_1 => for Outlet 1
- stock_outlet_2 => for Outlet 2
This will auto replace the total of outlet stock in All Stock.
When you click on the Name field it will automatically show you the detected fields. Simply select the custom field from the list that you want to import and drag & drop its value from the right side-bar into the Value field.
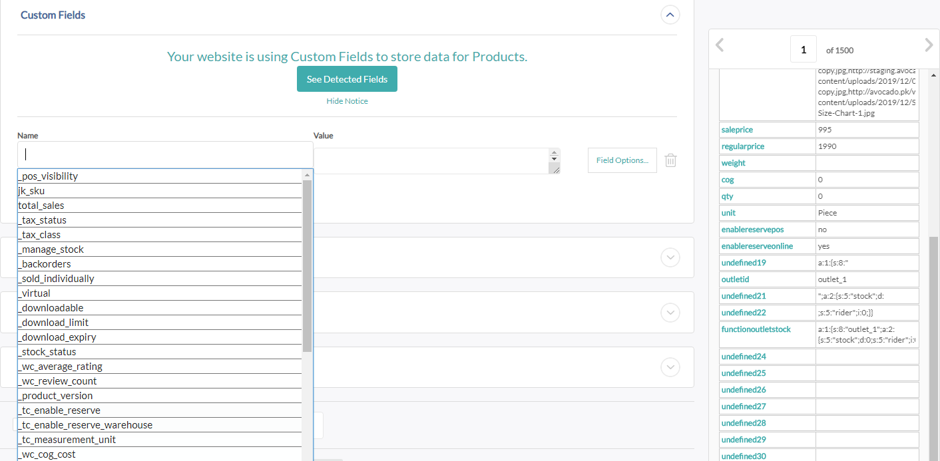
You can automatically detect all the custom fields of your website by clicking the See Detected Fields You can also add new custom fields as highlighted in the below image.
Must Tally Custom Fields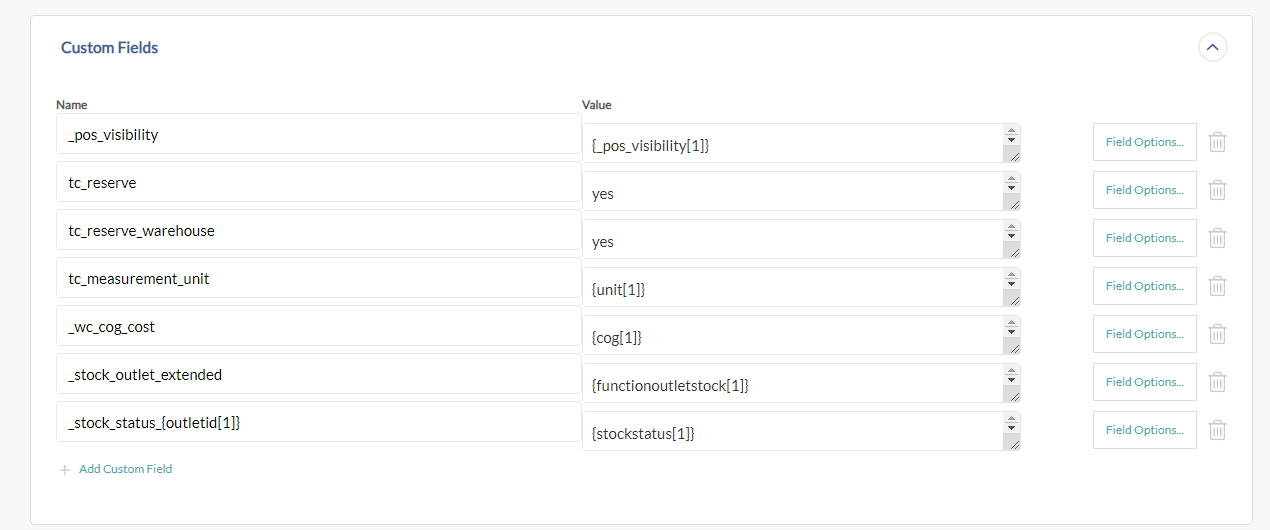
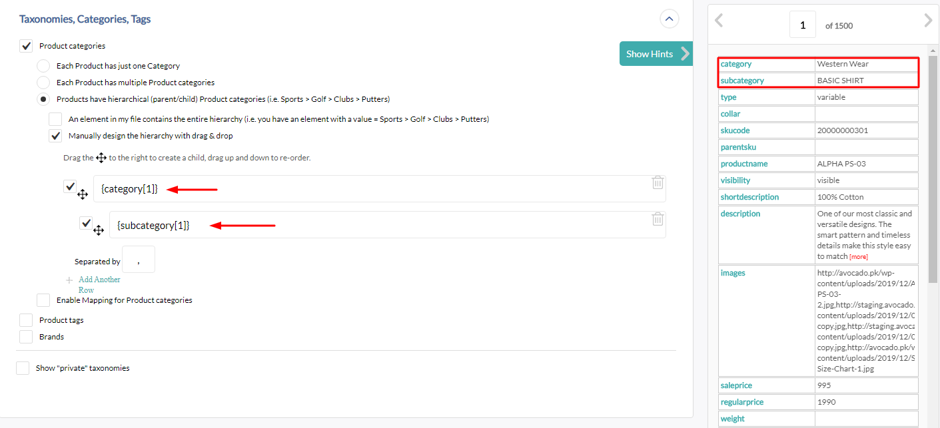
- Categories Section:
Select one of the options to specify the categories accordingly. If you want to map the categories manually from file than select the third option and drag & drop parent and child category accordingly in a hierarchical structure as shown in the image.
STEP # 07: Go To Step 4 #
Click on Continue to Step 4 to proceed.

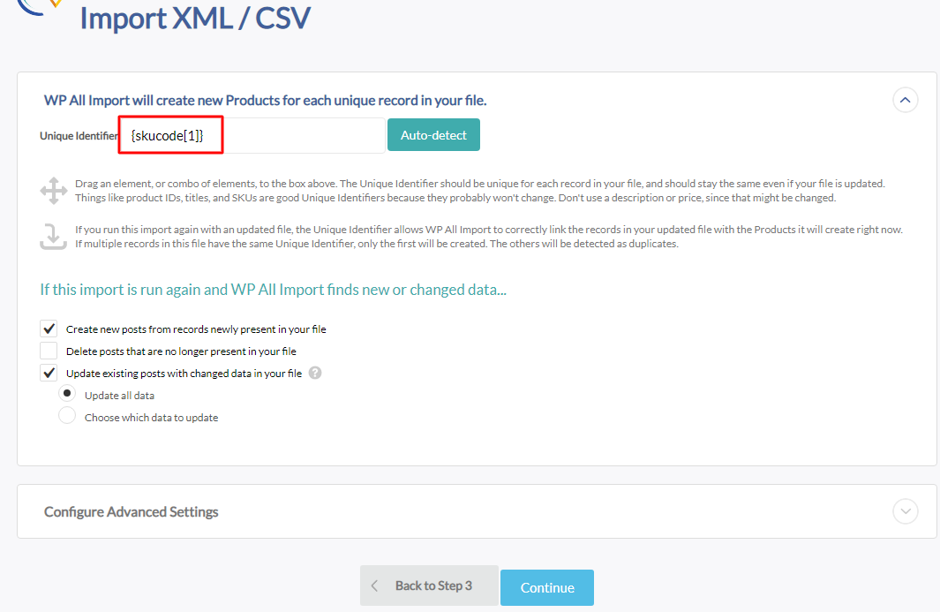
STEP # 08: Set Import Speed #
On the next page you have to specify the unique identifier to link the records of the file with the products it will newly create. You can also Auto-detect the identifiers.
- If your are using impaktt product synchronization tool than make sure to set the iteration process to 1 as shown in the image below:

- Leave the other options to default and click on Continue.
STEP # 09: Run Import #
Click Confirm & Run Import to run your import.


