Setting up an import for thousands of posts is very similar to manually creating a post. You create a template for your posts that All Import tool uses when importing your data. To set add data from your import file to your import template, you simply drag and drop it.
Navigation #
STEP # 01: Upload Your File #
Go to your website and under main menu click on All Import -> New Import.

Upload File #
STEP # 02 #
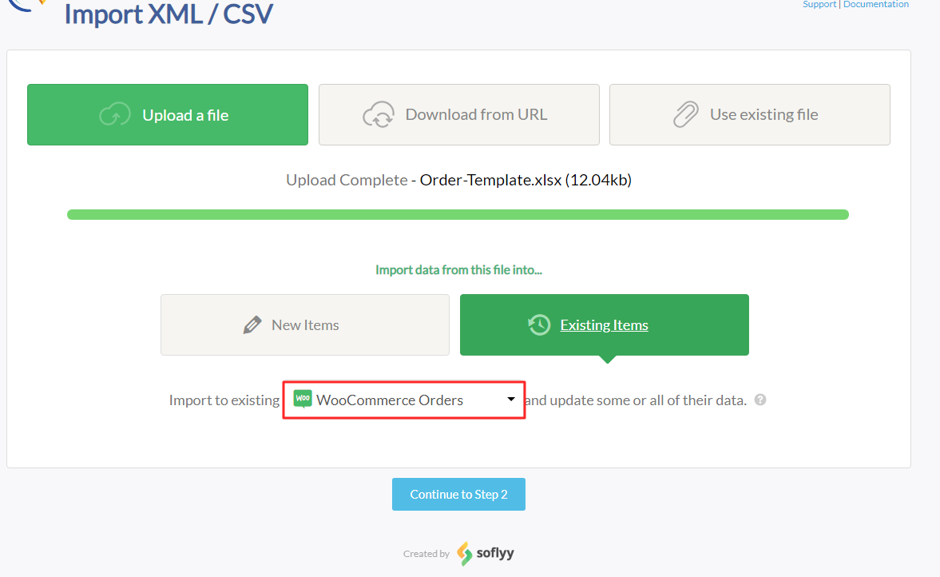
You will be directed to the below page. Here you can choose to upload the file from your computer, paste in a URL to the file, or choose an existing file that you’ve already used with All Import tool.

STEP # 03 #
After uploading the file, you have to choose from one of the two options:
- New Items -> Create only new items.
- Existing Items -> If you are importing data from your file into posts that are already in your site, select Existing Items.
Step # 04 #
Finally, you need to decide what you want to import, select the desired option from the dropdown and press the continue to Step 2 button.
Review your Data #
STEP # 05 #
All Import tool will process your file and prepare it for import. If you uploaded a CSV, check that the correct delimiter was used. If you uploaded an XML file, check that the correct node was selected.
If you only want to import some of the records in your import file you can add filter rules.
Click on Continue to Step 3.

Configure your Import #
STEP # 06 #
Every column or element from your import file will be displayed on the right. On the left you have your import. All Import tool will create posts using the import template you create here. Simply drag your import data from right to left. You can fill in as much or as little of the fields as you like depending on your needs.
- Order Details Section:

- Billing & Shipping Details Section:
- Billing:
You can load data from existing customer. If the match is not found than you can also import as a guest as shown in the image.

2. Shipping:
Fill the shipping form accordingly as shown below.

3. Payment:
Select a payment gateway from the options.

4. Order items:
Provide the order item details.

You can also manually import product order data without matching to existing products. See the image below.

5. Shipping:
In the shipping tab select the shipping method.

- Custom Fields Section:
To find meta keys for entering in the custom fields.
-
- Go to your website.
- Toggle menu and under Order Manager open Custom Order Fields.

3. The meta keys for each admin custom order field are in the format of _wc_acof_{id} where {id} is replaced by the integer id of the field. Copy the id’s clearly visible next to the label of each field as shown in the image below.

4. Now Paste the ID’s of Logistic, CN and BIS numbers that you have copy in the previous step into the fields shown in the image below. Follow the same format of meta key that we have described in the previous step.
Note: If you are using IMPAKTT order shipment solution, make sure to add order_weight in custom field, and bind it with import sheet order weight column.
Click on Continue to Step 4.

STEP # 07: Choose Which Data to Update #
Here you can tell WP All Import how to handle each specific piece of data. For example you can have it only add new images to posts, or just update the stock and price for your products.
In the last step you have to specify the unique identifier in order to match the existing items.
-
- You can match records with any of the below options shown in the image. Just enter the name and it’s value in the field.
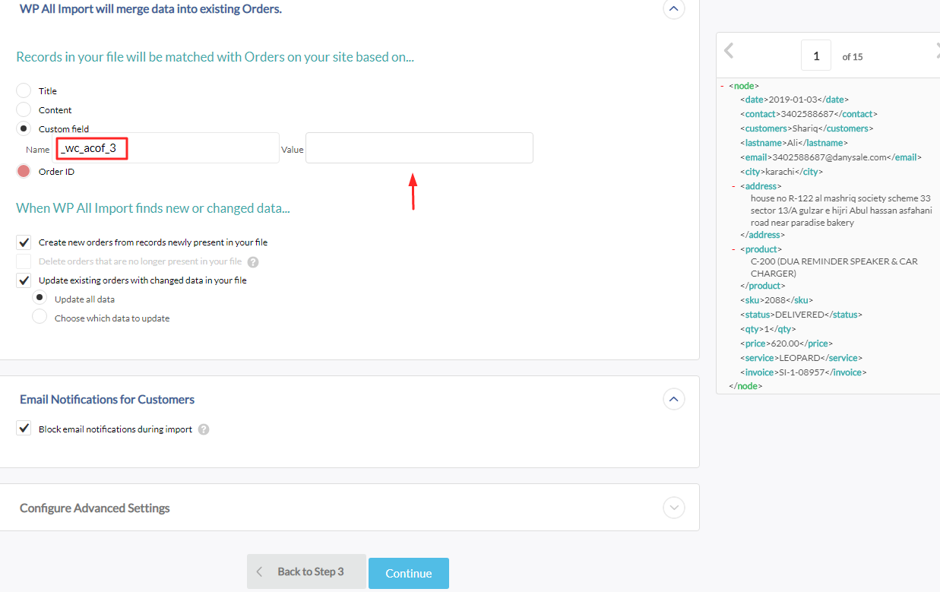
2. Click Continue to proceed to the next page.
Step # 08 : Run Import #
Click Confirm & Run Import to run your import.


